

Faux Stained Glass

Choosing a stencil
No worries—No drawing skills needed! We have a variety of designs on-site; from florals, animals, landscapes, and geometric shapes that mimic traditional stained glass. General admission includes a 6” canvas

Imagining your colors
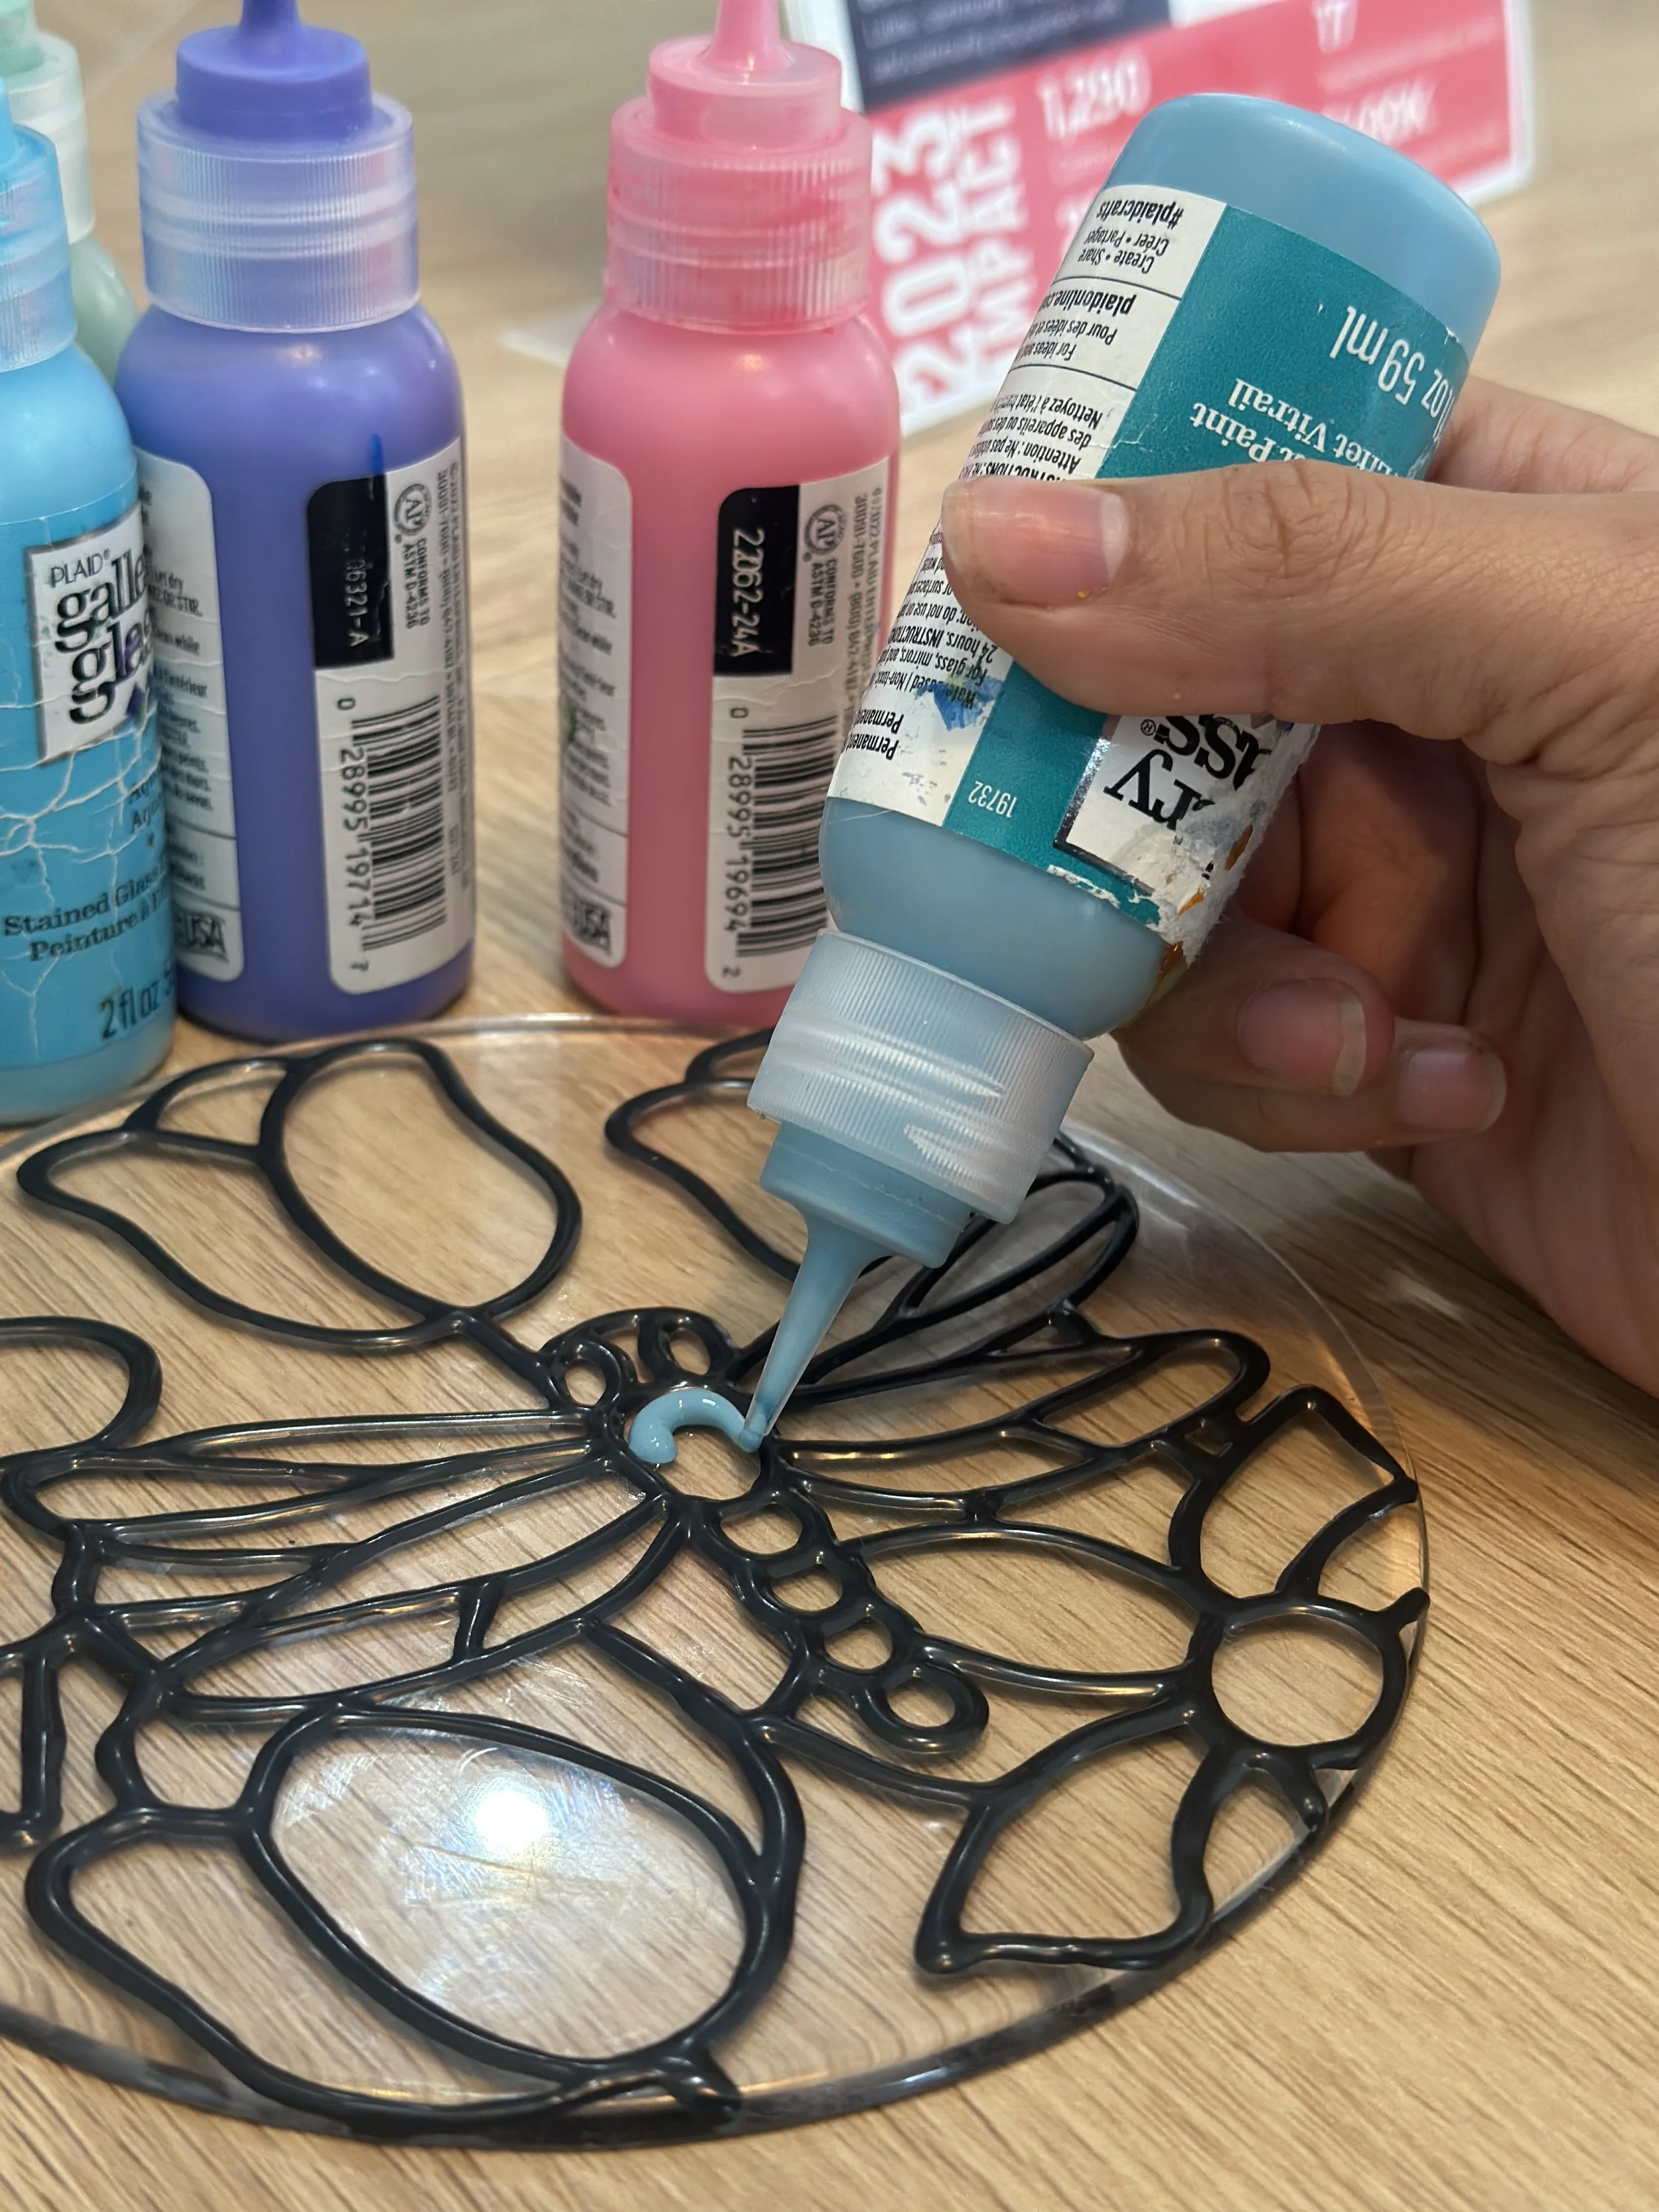
We have over 30+ colors to choose from, using the physical color key allows you to see what colors look like once they are dry. Our Faux Stained Glass bottles do not need to be shook— keep in mind that the paint looks different wet v.s. dry so double check those colors!
If you spill paint on your clothing, wash it off immediately with soap and water. Do not allow it to dry before cleaning.
WARNING:
How to Start
You’ll be applying paint on the textured side and make sure to keep your piece flat on the table.
Apply a small amount of paint in an area with a single color or mix two colors in one area next to each other. Paint will be opaque when wet and become more transparent once paint is dry- so patience is key!
Applying the paint
Start by filling an area with one color. If you are using more than one color in a single area try using complimentary colors
(Colors that “go-together” and compliment each other) Applying the paint along the black edges can help you fill in those small crevices.
Things to also keep in mind:
Do NOT overflow one area of paint
Do NOT put paint anywhere but your piece

Additional Notes
Colors look different when they are wet v.s. when dry so be sure to double check the names on the bottles and the color key provided. with a single color or mix two colors in one area next to each other.
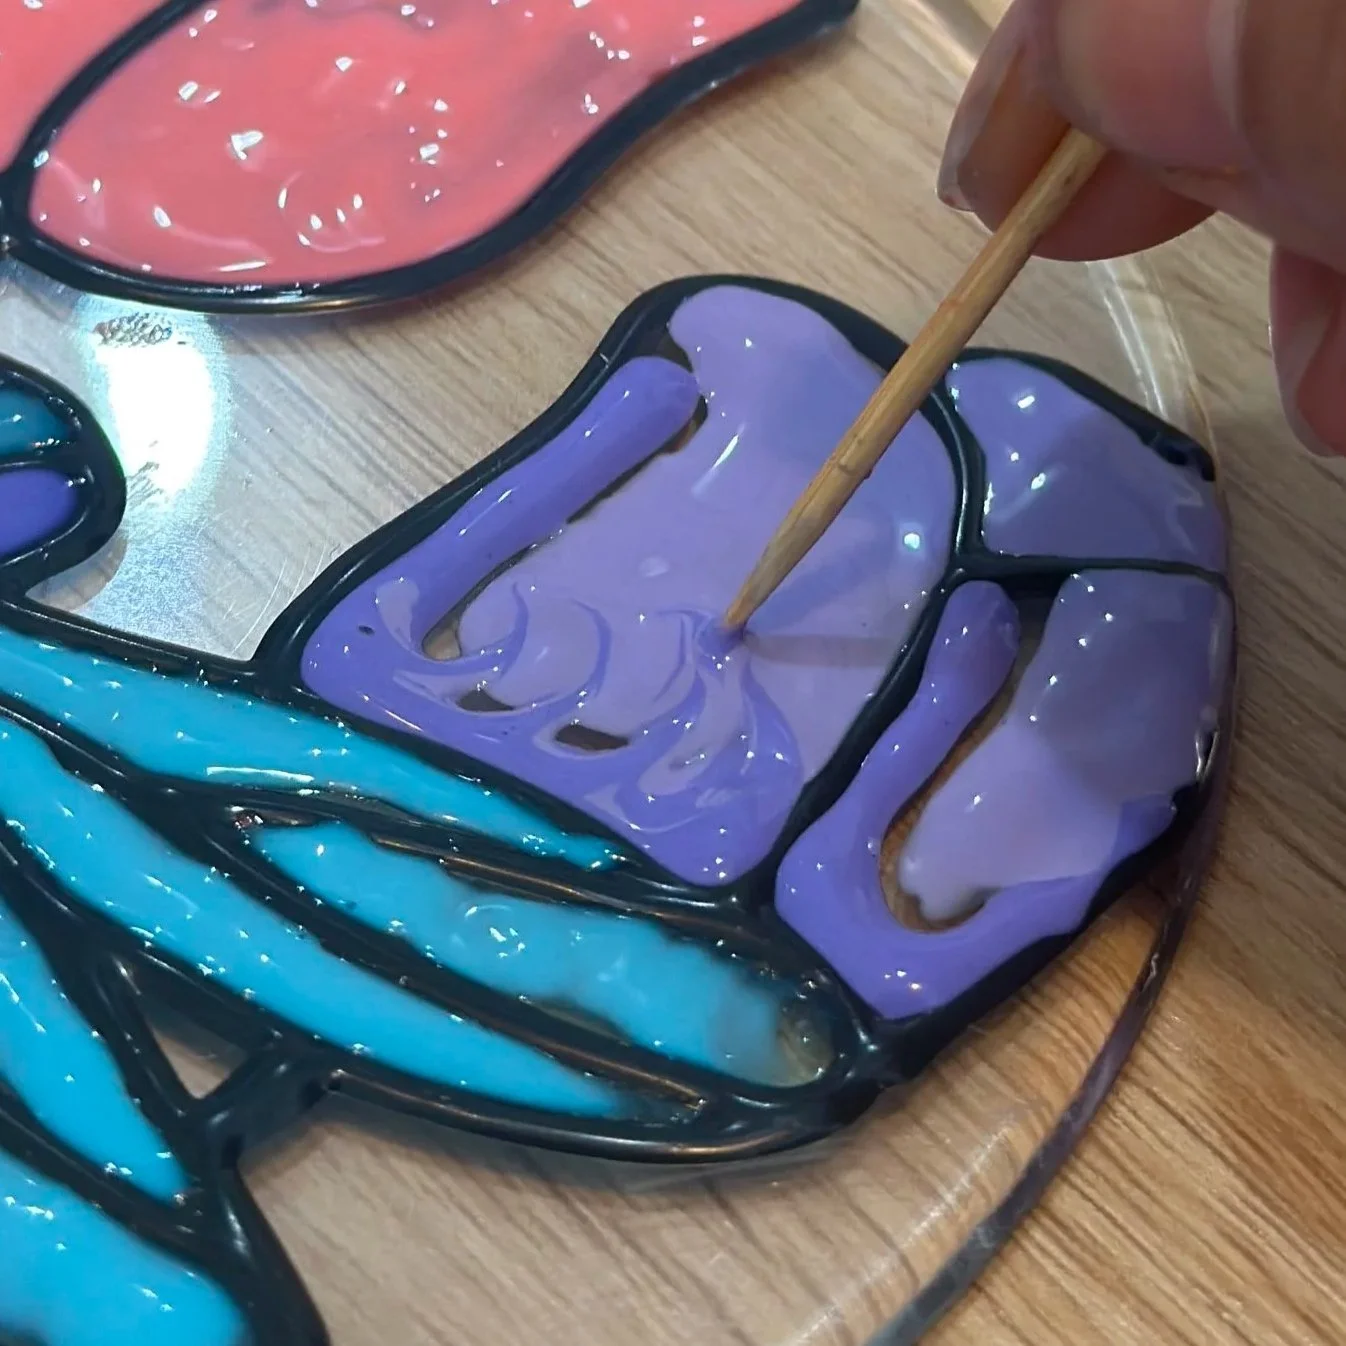
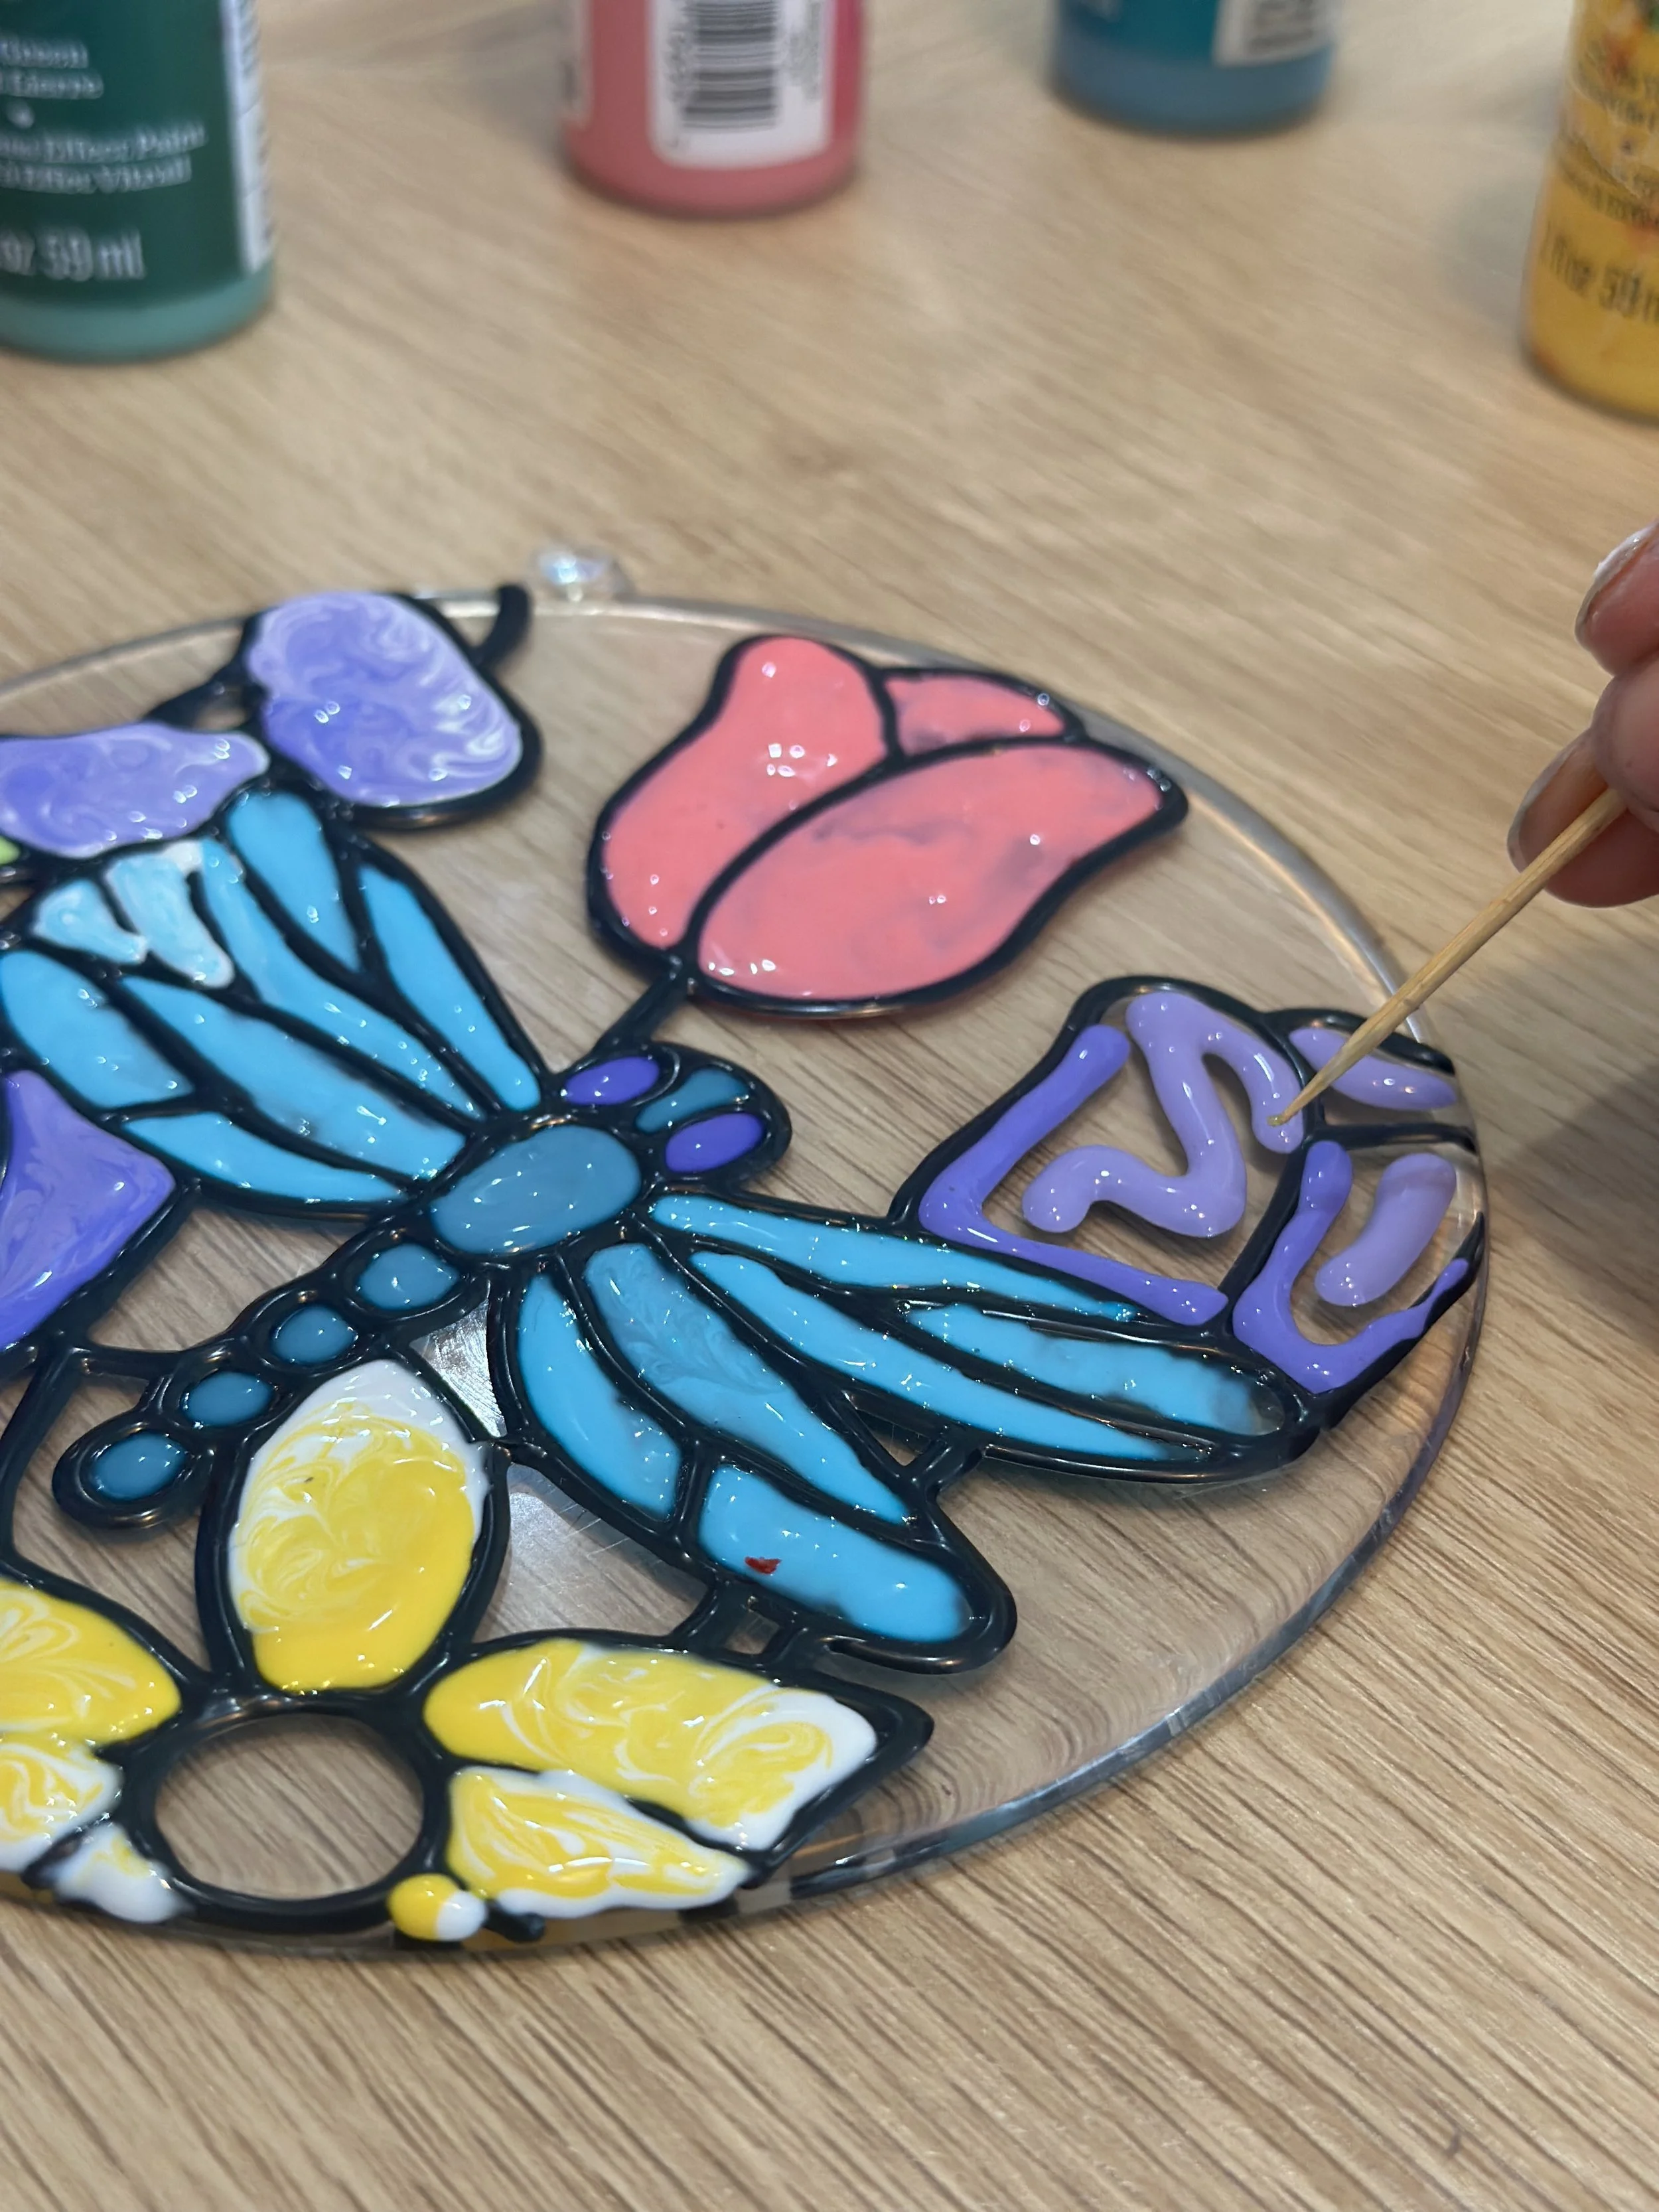
Painting Techniques
Shading: Apply two colors side by side. With a toothpick, gently move the colors together where they meet. Blend the two colors a little by moving in a circular motion. Blending will create a new color between the two.
Marble: First apply dots in the desired area with one color leaving some spaces for your secondary colors. Apply dots of your secondary color in the remaining spaces. Use the toothpick to swirl the two colors together creating a marbleized look.
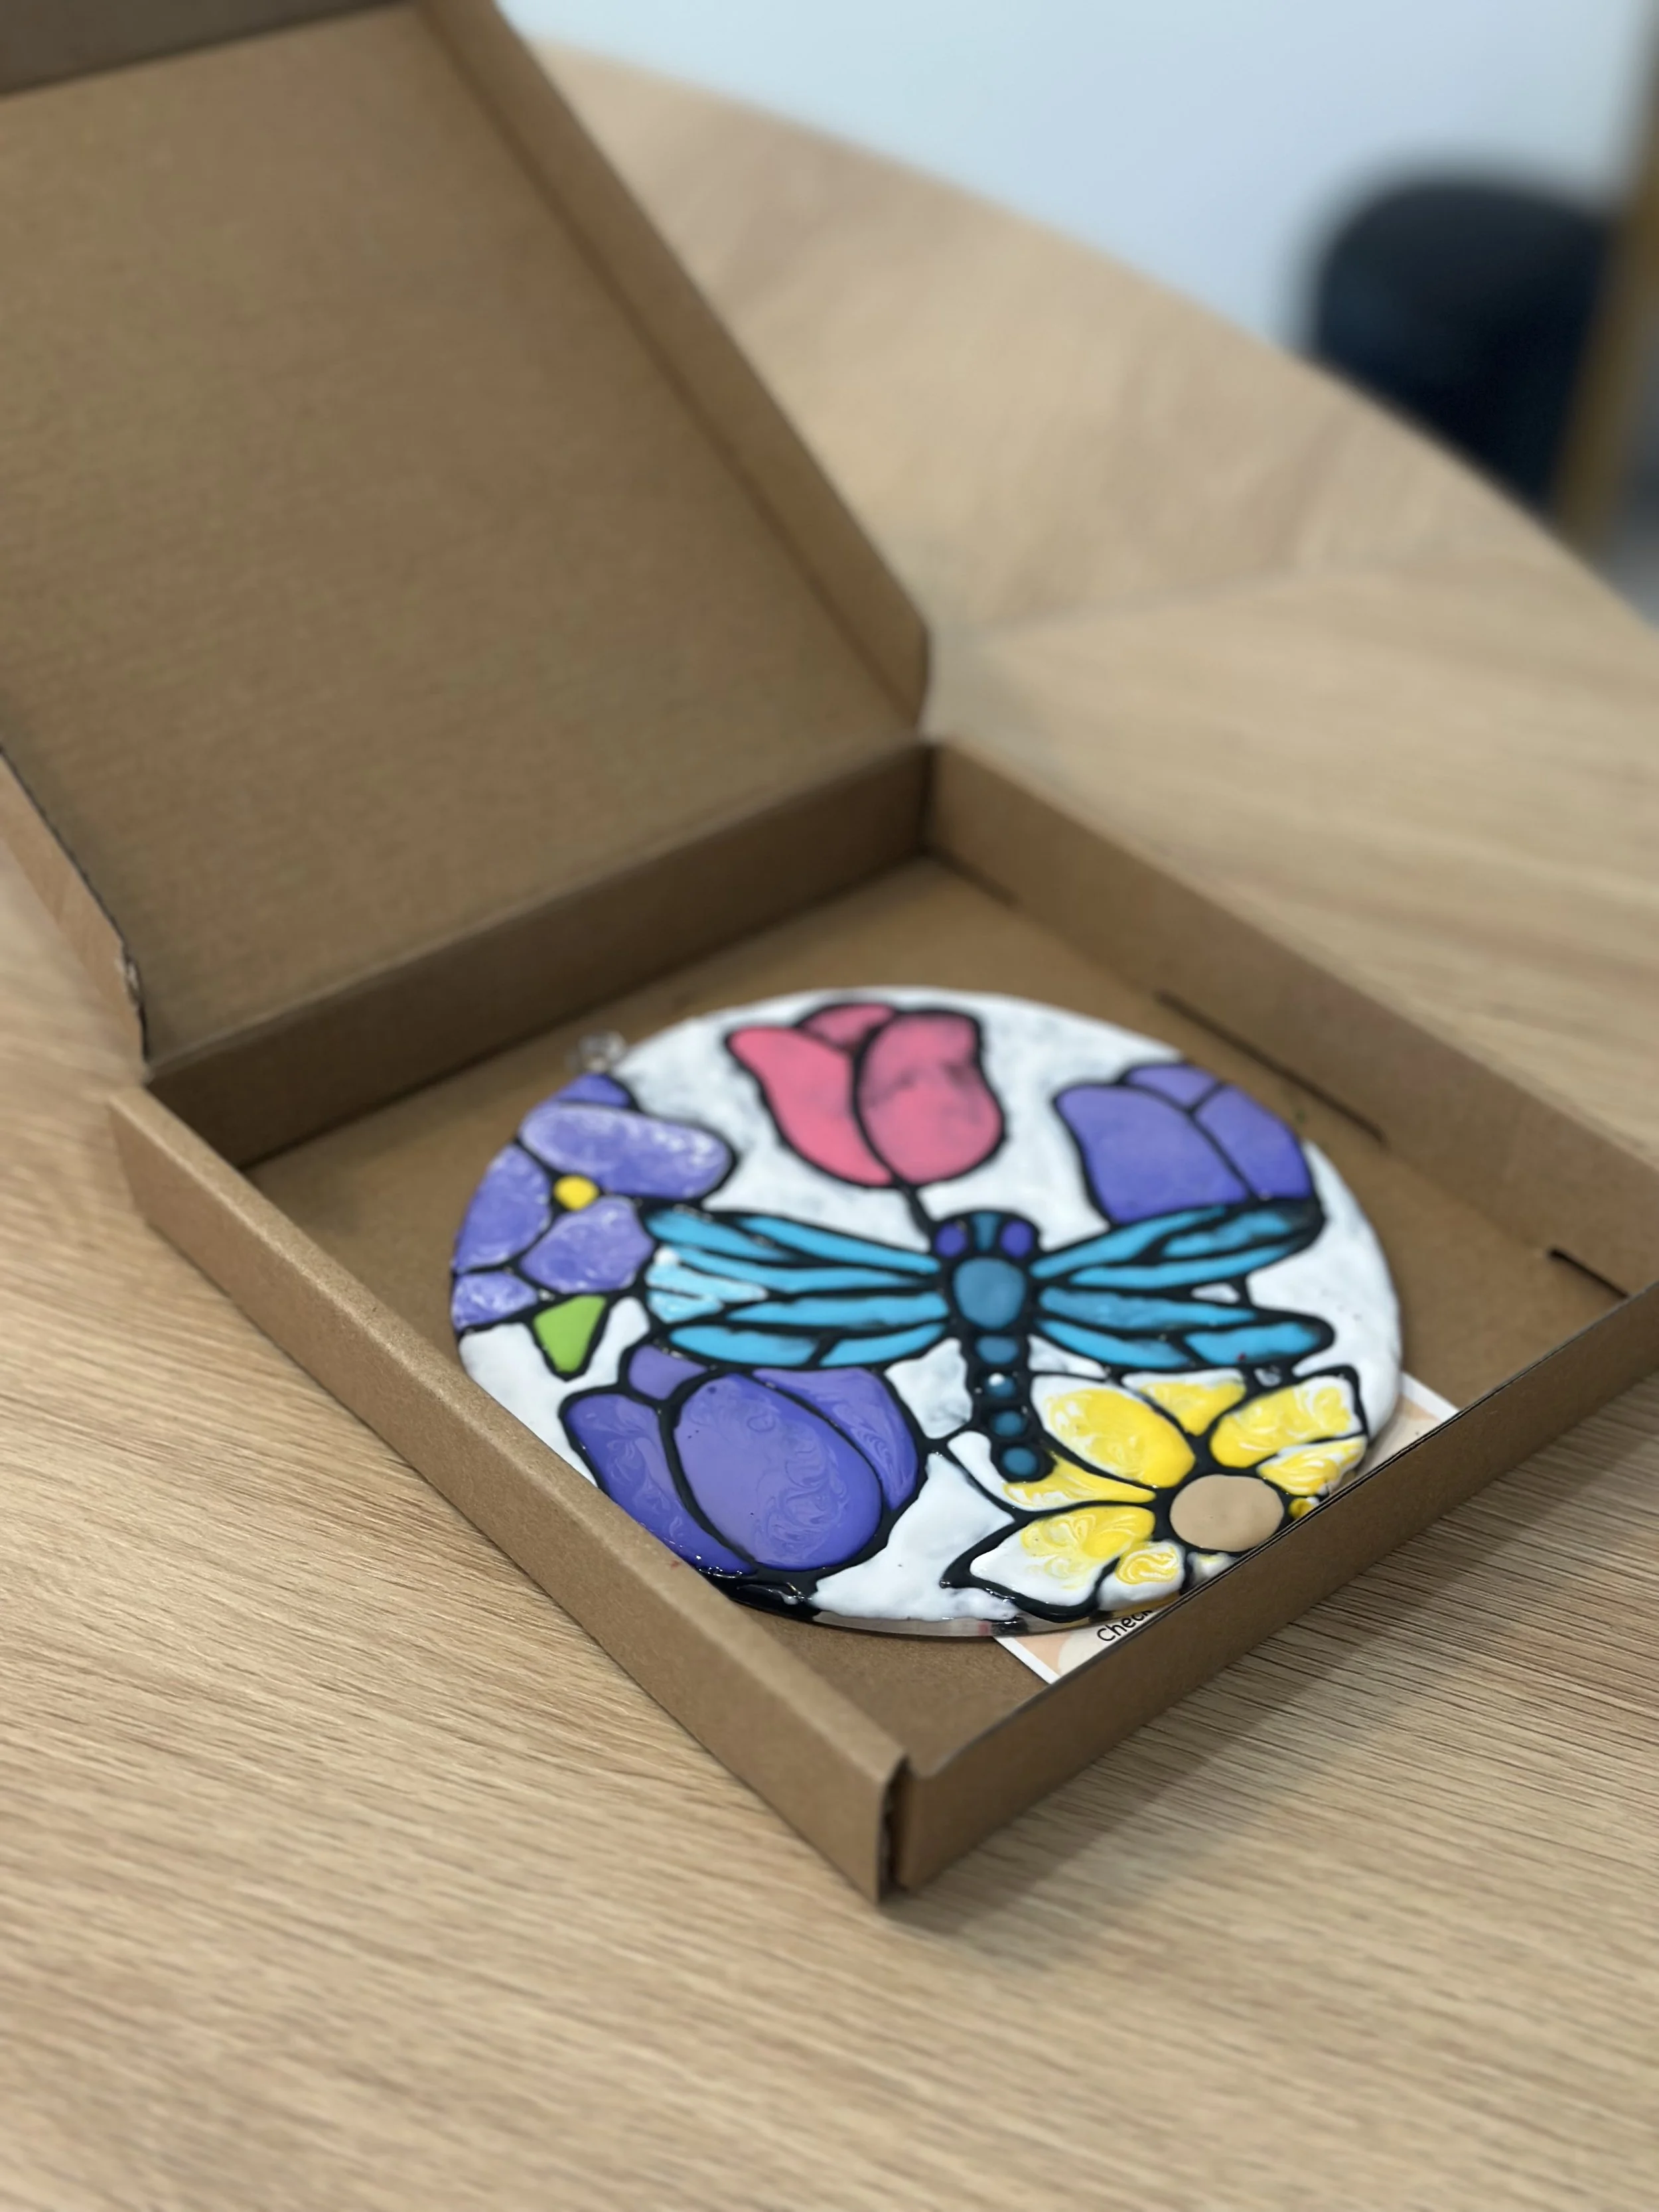
Once your done
We have to-go boxes available near the supplies so you can take your piece home! Feel free to grab one and place your piece inside.
Let your piece dry in a well ventilated area or just leave it in the box, and refrain from touching till dry. Depending on the thickness of the application, dry time can take up to 24 hours. A good fan helps!